Table of contents
- Prerequisites:
- Step 1: Generating keys on Jenkins master
- Step 2: Copying public key contents to agents' authorized_keys file
- Step 3: Configuring Jenkins credentials in Jenkins master for an agent connection
- Stage 4: Configure node agent in Jenkins master:
- Step 5: Verifying node agent connection status
- Conclusion:
In this article, we will see step by step approach to configuring agents with a Jenkins server. This approach is guaranteed to work 100%.
I am going to configure one node as a Jenkins agent here. Below are the required steps for achieving our end goal.
Prerequisites:
Both Jenkins master and agents should have the same version of Java installed on them.
Step 1: Generating keys on Jenkins master
As in the agent configuration process, Jenkins master is going to authenticate agents with keys so we need to first generate these keys on Jenkins master.
A general approach is to go with RSA keys but it is observed in many cases that we don't achieve stable connection behaviors with RSA keys i.e it will work with one agent while with the same keys, it will give a public key authentication error for another agent. Hence to get around this we will use EdDSA keys where the difference between RSA 2048/4096 and Ed25519 is a trade-off between performance and compatibility. RSA is universally supported among SSH clients while EdDSA performs much faster and provides the same level of security with significantly smaller keys.
Run the below command on Jenkins master to generate keys:

This will generate public and private keys to the default location i.e. inside the .ssh folder of the user's home directory i.e. ~/.ssh.
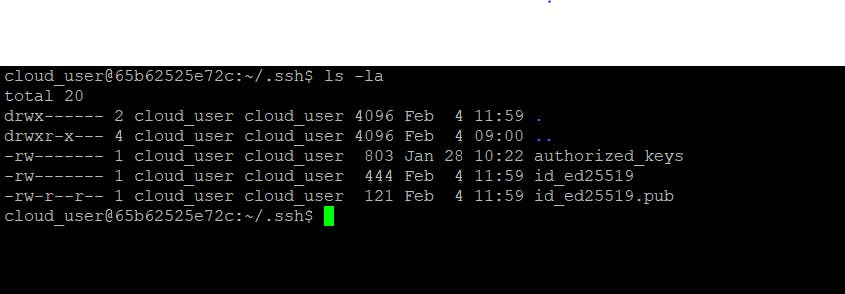
here, id_ed25519 is the private key and id_ed25519.pub is the public key.
Step 2: Copying public key contents to agents' authorized_keys file
As we can see in step 1, we have created id_ed25519 and id_ed25519.pub keys. Now, we will copy the contents on id_ed25519.pub to the authorized_key files of our agents.

As we can see in the above screenshot, the contents of id_ed25519.pub file are highlighted

As we can see above, we have copied id_ed25519.pub contents to ~/.ssh/authorized_keys file
Step 3: Configuring Jenkins credentials in Jenkins master for an agent connection

As we can see in the above screenshot we have to go inside Manage Jenkins > credentials > system > Global credentials(unrestricted). the first thing we have to choose here is the kind of credentials which in this case is "SSH Username with private key".
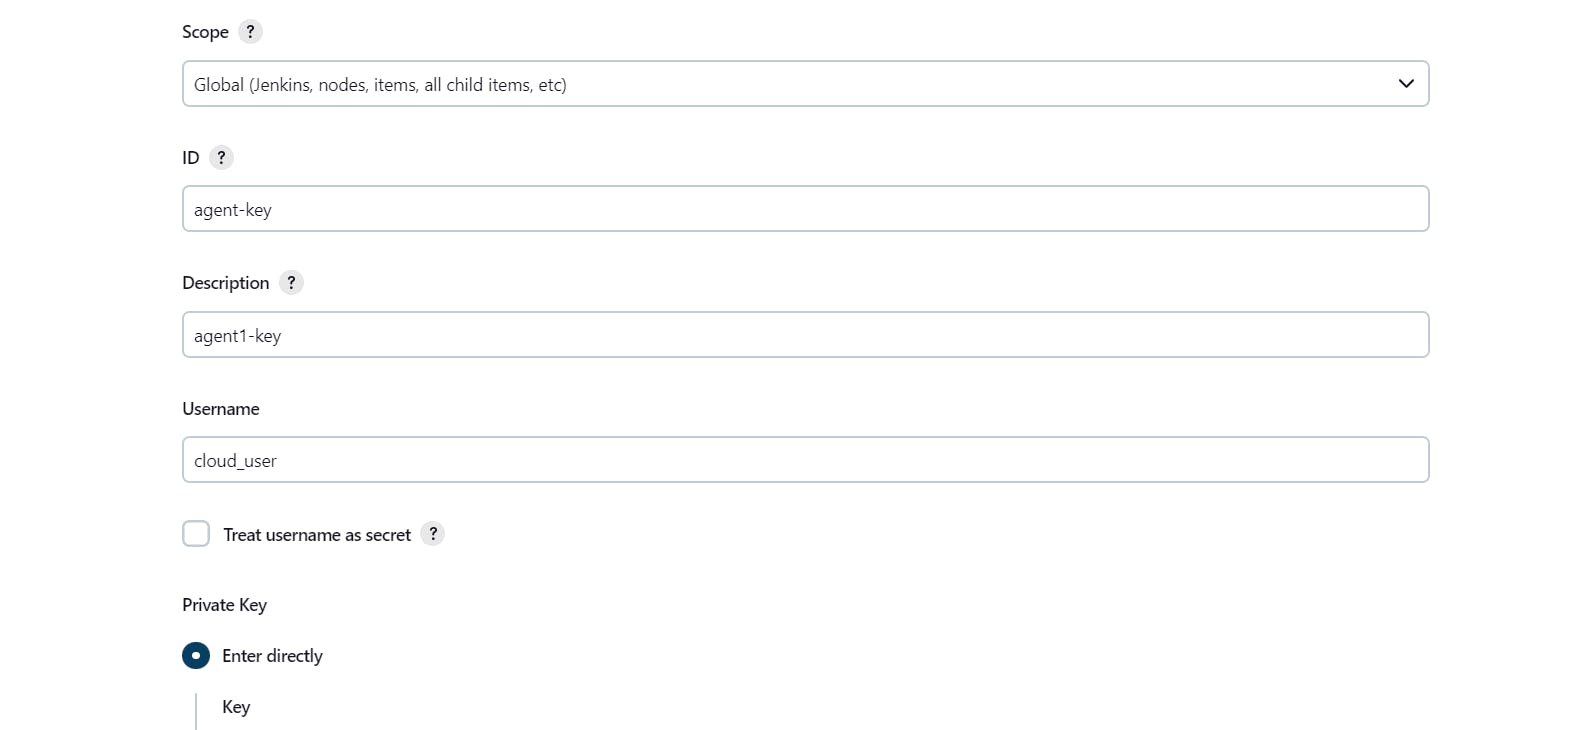
We will keep the Scope Global. Then "ID" is the important field where we will be specifying unique credentials ID for this credential. Under the description, we can mention anything. In the "Username" field we have to mention the username of the user on Jenkins master under whose ~/.ssh folder we have a private key.
Under the Private key field, we have to add the contents of the private key i.e. id_ed25519.
Below is the screenshot of private key contents:

Stage 4: Configure node agent in Jenkins master:
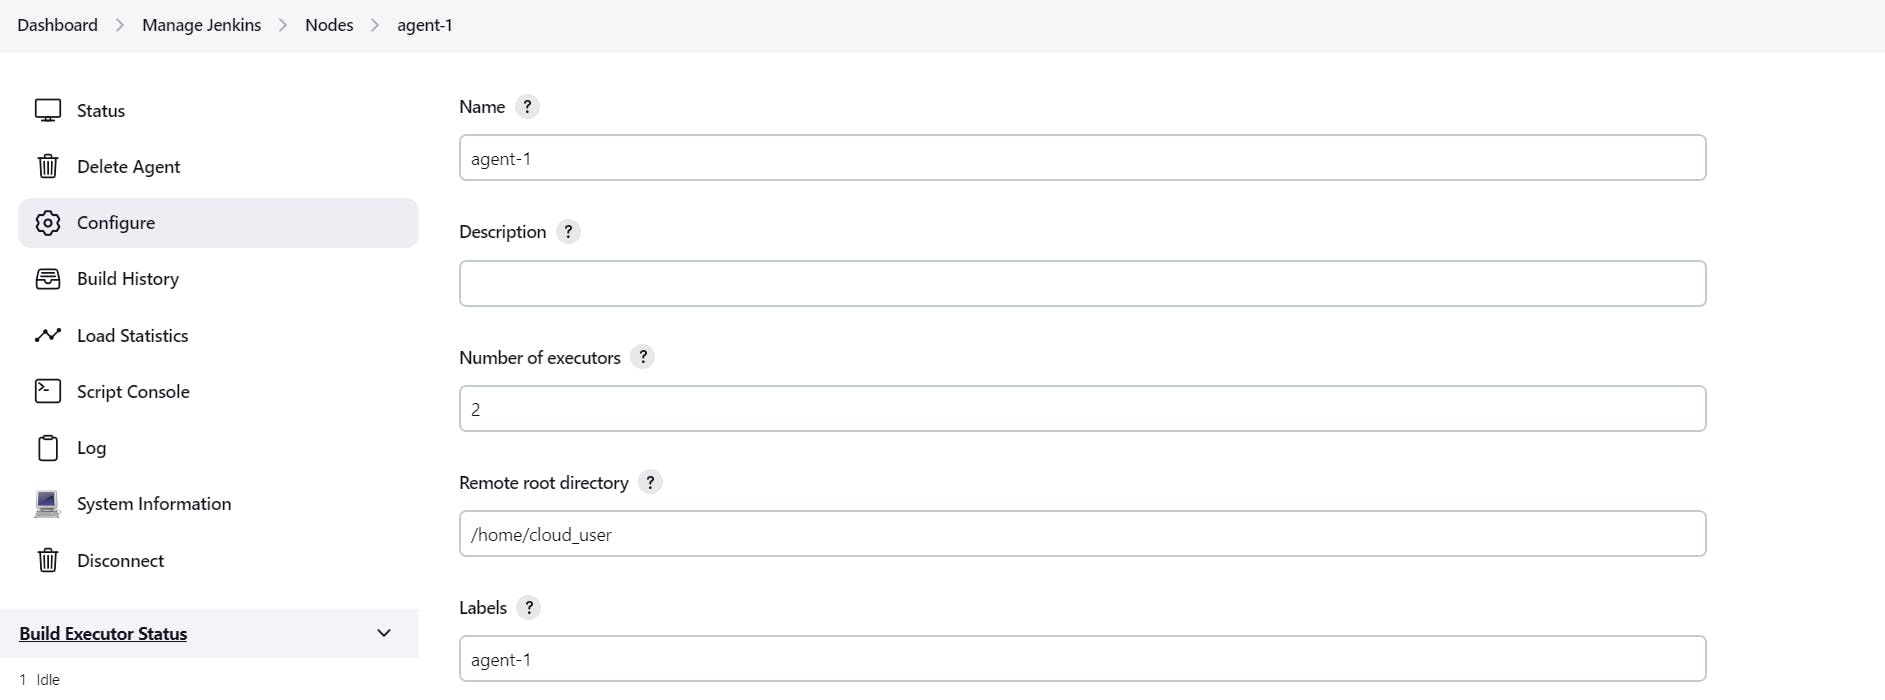
As we can see above, we have to go to the path Manage Jenkins > Nodes > add node
Under the "Name" field, we have to specify the name of this node.
Under "Description" we can mention anything about this node.
"Number of executors" is the maximum number of concurrent builds that Jenkins may perform on this node. This value should be equal to or less than the number of CPU cores on this node.
"Remote root directory" is the directory path on the agent node where we want to run Jenkins tasks.
"Label" is the unique identity that we assign to this node such that while assigning tasks, Jenkins master uses this label to address node agents.
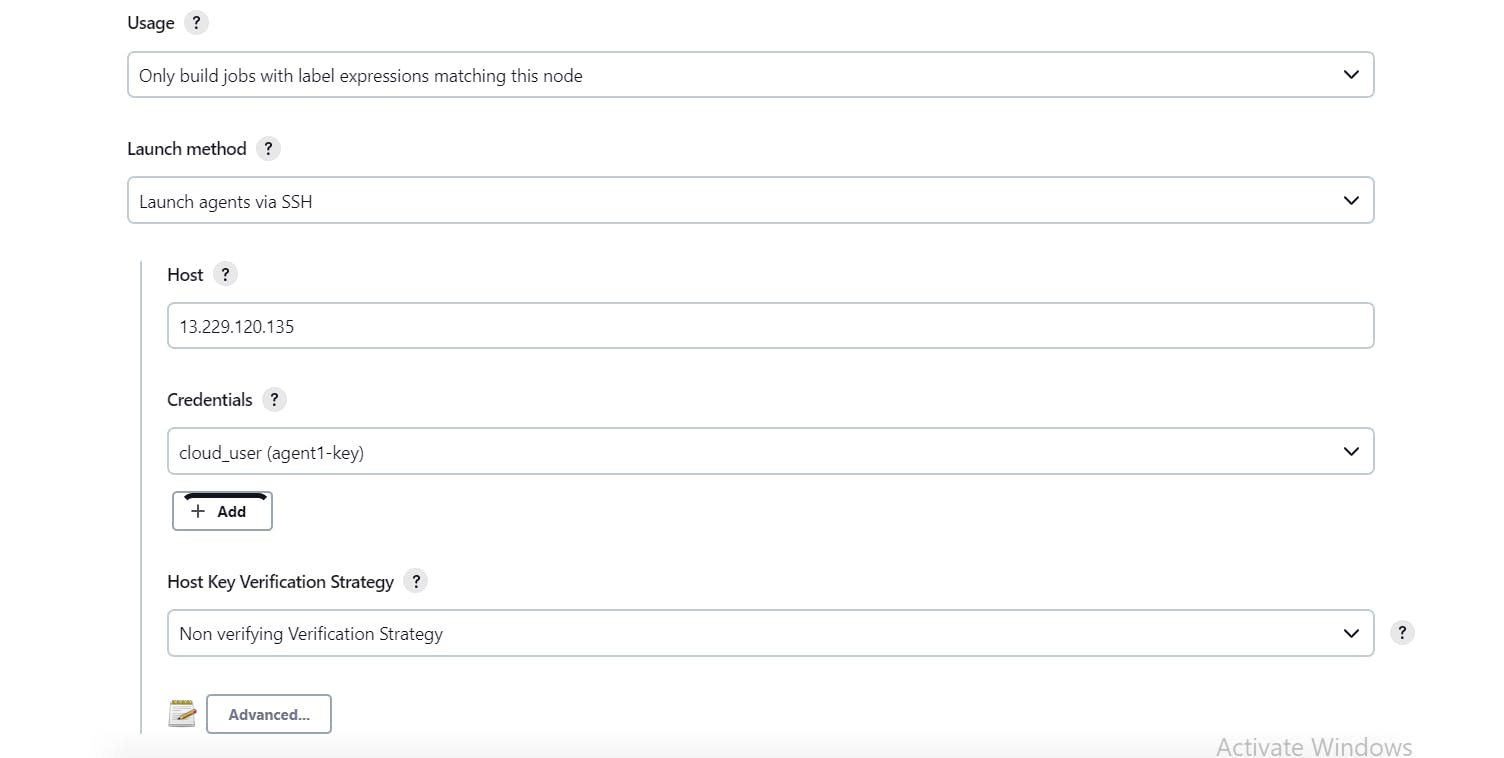
In the Launch method, we have to select "Launch agents via SSH" to which we have to mention the IP address of the node agent in the "Host" field. Under the credentials drop-down we will select configured credentials in step 3. We can keep the Host key verification strategy as Non verifying. Then we will save our details.
Step 5: Verifying node agent connection status

Once the node agent is configured by following the steps in stages 3 and 4 we can see our node agent under Manage Jenkins > Nodes. Here we can see that our node agent is launched and connected successfully.
Note: Here I have created agent-1 and agent-2. For agent-2 configuration, you have to follow these same steps.
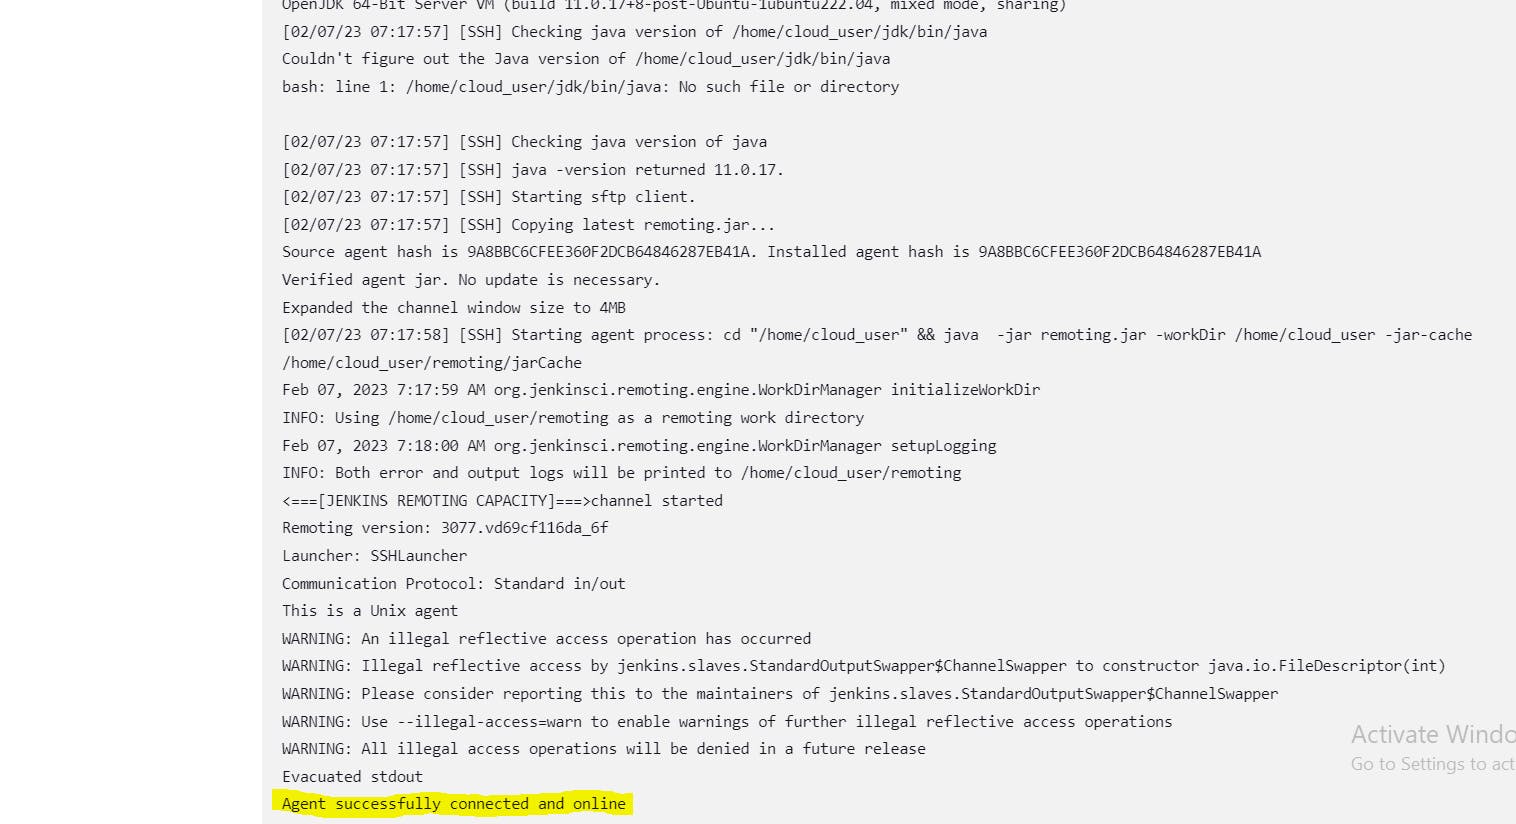
Once our agent is launched successfully we can verify that from the agent logs below:
Conclusion:
Once we run the pipeline through Jenkinsfile or run freestyle projects, it is not the best practice to run all the tasks locally on the Jenkins server. Instead, a rather more real-world approach would be the one where the Jenkins master will delegate these tasks to configured remote agents. This article will very much help you in launching Jenkins agents without wasting too much time in solving the public key error.
